Create Custom Frequencies
To create a new custom frequency, follow these steps:
- Press the Menu Key
to open the Main Menu.
- Use the Down Arrow Key
to highlight the Custom Frequency icon.
- Press the Select Key
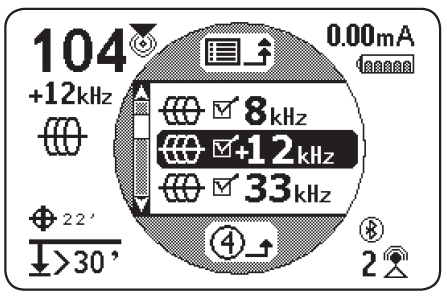
to open the Custom Frequency Menu.
- There are three types of frequencies you can create
- Sonde
- Active Line Trace
- Passive Line Trace
- Highlight the type of frequency you want to create and press the Select Key
.
Note: There are additional preprogrammed frequencies that can be added to the active frequency list from this menu. Press the Select Keyto
toggle the frequencies active and inactive. - Press the Select Key
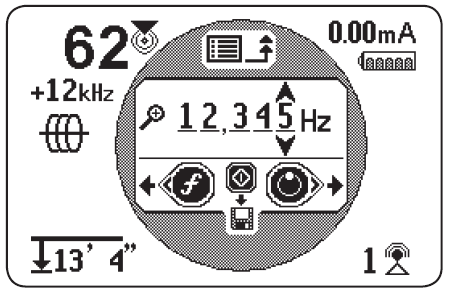
again to display the Frequency Input screen.

Note: You can tune the SR-24 to a frequency by watching the Signal Strength in the lower right of the screen while adjusting the frequency. - Use the Left and Right Arrow Keys
to move between digits and use the Up and Down Arrow Keys
to increase and decrease the value of the digits.
- Press the Select Key
to save the custom frequency.
Note: A plus sign icon appears between the check box and the frequency.
- Press the Menu Key
to save and exit.
Note: The custom frequency you created is the selected frequency.
Create Custom Frequencies
To edit custom frequencies, follow these steps:
- Open the Custom Frequency menu and highlight the custom frequency that you want to edit.
Note: Refer to steps 1 through 3 in the Custom Frequencies section for instructions on how to access the Custom Frequencies menu. - Press the Frequency
Key to open the Frequency Input screen.
- Use the Left and Right Arrow Keys
to move between digits and use the Up and Down Arrow Keys
to increase and decrease the value of
the digits. - Press the Menu Key
to save and exit. The custom frequency you edited is the selected frequency.
Note: Alternatively, you can highlight the custom frequency that you would like to edit from the Main Menu. Once highlighted, press the Frequency Keyand the Frequency Input Screen automatically opens.
Delete Custom Frequencies
To delete custom frequencies, follow these steps:
- Open the Custom Frequency menu and highlight the custom frequency that you want to edit.
Note: Refer to steps 1 through 3 in the Custom Frequencies section for instructions on how to access the Custom Frequencies menu. - Press the Frequency
Key to open the Frequency Input screen.
- Change all digits to zero.
- Press the Select Key
to delete the frequency.
- Press the Menu Key
to save and exit.
Note: Alternatively, you can highlight the custom frequency that you would like to delete from the Main Menu. Once highlighted, press the Frequency Keyand the Frequency Input Screen automatically opens.
